Crumble egg junkbot

This is a two-part series on a new Junkbots project. In last part building the junkbot itself was discussed. In the this part controlling the junkbot via Crumble is discussed.

So build the junkbot as discussed in the previous blog post.
Kit
·      Kinder Egg (without the Chocolate and toy)
·      Battery pack and 3xAA
·      Vibrating motor
·      Tape (lots of)
. Sticky-tack of some form.
·      Pens
·      Paper
·      Scissors
·      Glue and Gluegun (optional)


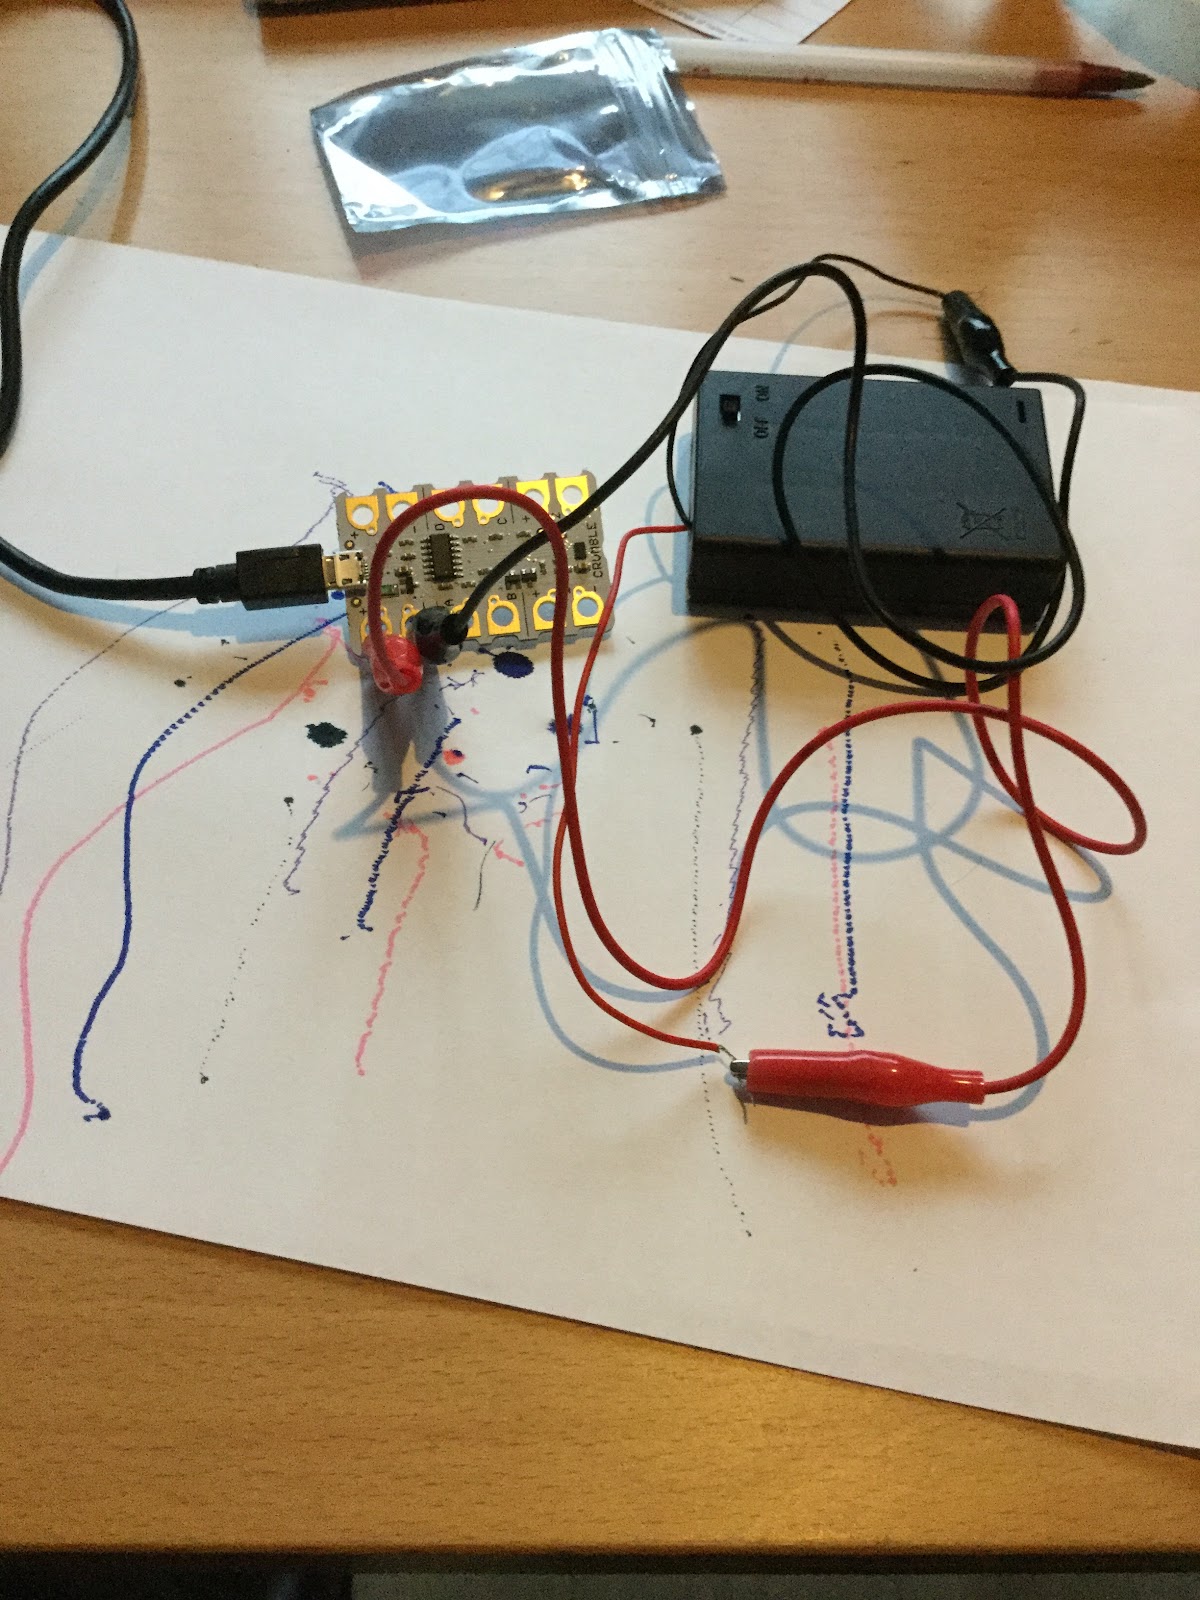
Disconnect the battery connection (the connections on the motor can stay as they are). Connect the USB cable to the Crumble. To the right of the USB connect there are two connections marked + and -. Connect a Red wire to the + connection and the other end to the red wire of the battery pack. Connect a black wire to the – connection and the other end to the black wire of the battery pack.
IMG_0583.JPG IMG_0584.JPG
Stage 2: Connect the Egg!
On the Crumble, on the right-side there are two motor connections connect the Motor to these connections. Don’t worry about which of the motors wires is need you swap them ar3age 6: Programming it – Making the bot moves.
The software can be found at https://redfernelectronics.co.uk/crumble-software/ it includes how to set it up on your own machine.
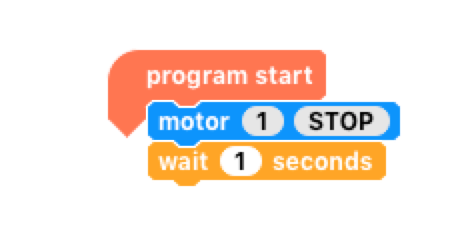
Start the Crumble software. Drag from the left the Program start, motor, and wait blocks. Now join the up start block at the top and the motor block next and the wait block last.
Screen Shot 2017-10-23 at 16.23.51.png
Your code should look like this.
Screen Shot 2017-10-23 at 16.23.43.png

Click on the stop within the motor block. It should change to forward. Now you are ready to make it move. Press the green arrow and with the battery pack on, it soud (hopefully )keeop moving.
Screen Shot 2017-10-23 at 16.24.12.png

If you put a second motor block after the wait blck with the stop inthe boSck. It su.If you put a second motor block after the wait block with the stop in the block. It such more.

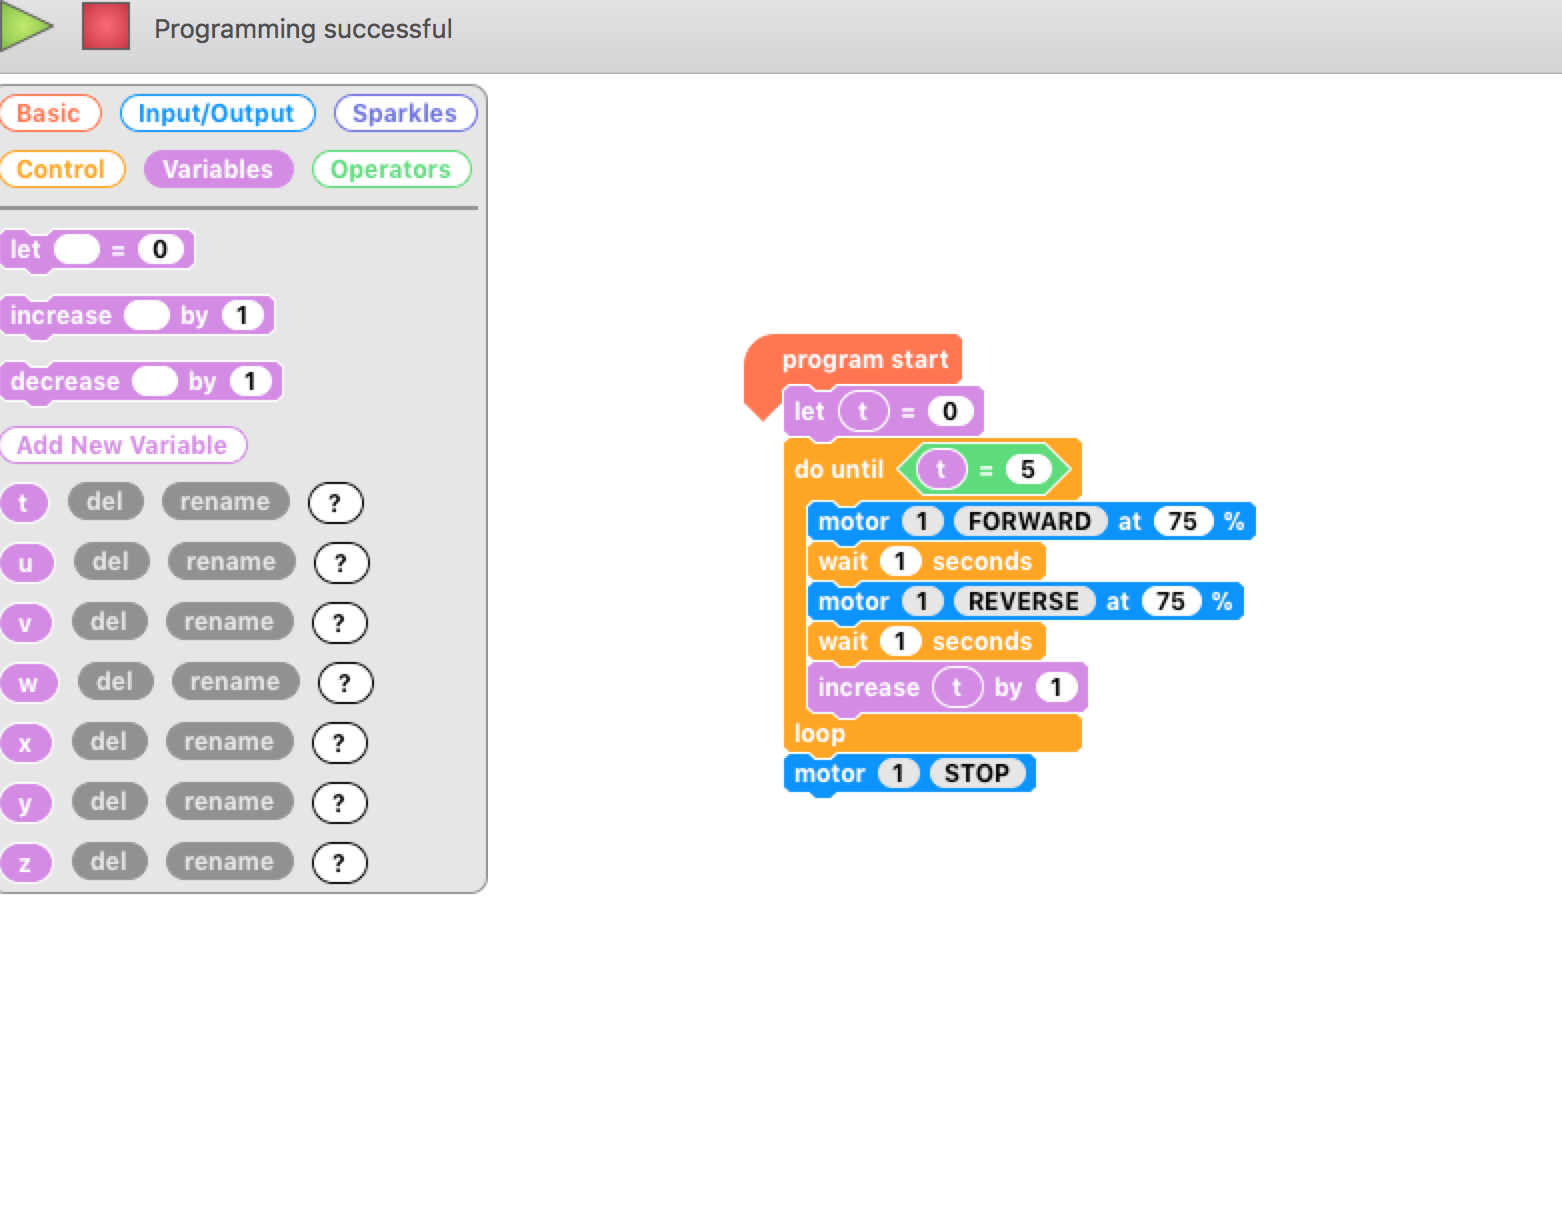
-    Drag a do-until block in (found in the control menu).

-    Go to variable menu and add a new variable, I have used t, select the block marked let=, and drag a t into the blank space.

-    Drag an increase block onto the screen and drag a t into the blank space.
Screen Shot 2017-10-23 at 16.27.45.png
Go to the operator menu and drag onto the screen an = block, go back to variables menu and drag a t into the first space on the = block and click on the second space on the block and type in 5.
Screen Shot 2017-10-23 at 16.29.02.png
Now for the challenge put all these together to copy what is shown below. Now, put the egg-bot on the paper, with the pen lids off, it should draw.


Comments

Popular posts from this blog

junkbots 3 - bring it all together

Junkbots session 3: Move the robot but now there are rocks in the way.  This is the last of three posts - Introduction and sequence - Loops and just having fun - This one: Making decisions and bringing it all together. What is the Junkbots project The Junkbots project has been running for a number of years as an initiative to bring sustainability, computing and engineering together by building bots out of junk; details of the project can be found at.  https://junkbots.blogspot.com/  . Junkbots is an extension of the Research into the teaching problem-solving going on at the University of Northampton please feel to visit  https://computingnorthampton.blogspot.com/2019/01/problem-solving-research-outputs-and.html  for more details.   What are we going to do? ·         Play with a Scratch robot on the screen! ·         Build on the routines from the previous session. ·    ...

Junkbot Raspberry Pi: 3 How to do it

Figure 1 In previous posts I start looked at using ScratchGPIO to control a junkbot  ( http://junkbots.blogspot.com/2014/08/junkbot-pi-1-scratchgpio.html ) and showed a Pi controlled junkbot briefly in action ( http://junkbots.blogspot.co.uk/2014/08/junkbot-raspberry-pi-2-raspberry-pi.html ). In this post I aim to discuss - Choice of motor controller card - Provide an example of a drawing junkbot controlled through Scratch and Raspberrry Pi Choice of interface/Controller card The card choosen was the 4Tronix PiRoCon card  ( http://4tronix.co.uk/store/index.php?rt=product/product&product_id=182 ). Selected for four reasons - Price is reasonable (in my opinion). - Fits straight onto the Pi through the GPIO - no extra cables needed. - ScratchGPIO has it as an addon so it makes programming it even easier (see http://cymplecy.wordpress.com/2013/10/31/pirocon-from-4tronix/ ). - Others are using it for robot projects. Use it is quite easy plug the board directl...

Brooke Weston Event

Students at Brooke Weston School, Corby have been working with the University of Northampton's School of Science and Technology on the junkbots project. Scott Turner and Terry Tudor on the 16th and 17th February 2010 went to the school to run the sessions. Starting with a talk and activities on waste management, including how much waste the UK produced, and in terms of numbers of slices of toast what is the cost of energy of leaving a monitor on overnight.   The task was to produce robots out of rubbish that could carry other rubbish into a containment area. The change made to the sessions was that students brought there own 'junk' to the sessions. S ome innovative and creative designs were produced involving 'legs', wheels (including turning cans into wheels and wheels from old toys).    Some of the designs pushed rubbish into the area, but one of the designs carried the rubbish into the area and some designs used magnets to pick up small steel parts (nuts a...